- Level : Easy
- Prep : 30 Mins
- Cook : 30 min
- Serves : 3-4
Ingredients
(Makes One Loaf)
- self-raising flour, plus extra for dusting 1lb / 450g
- sugar 2 tsp
- salt 1 tsp
- lard or butter, plus extra for serving 5oz / 100g
- milk, plus extra for brushing ⅔ cup / 150ml
- water ⅔ cup / 150ml
You will also Need
Your O-Grill (Of Course)
How To Make It
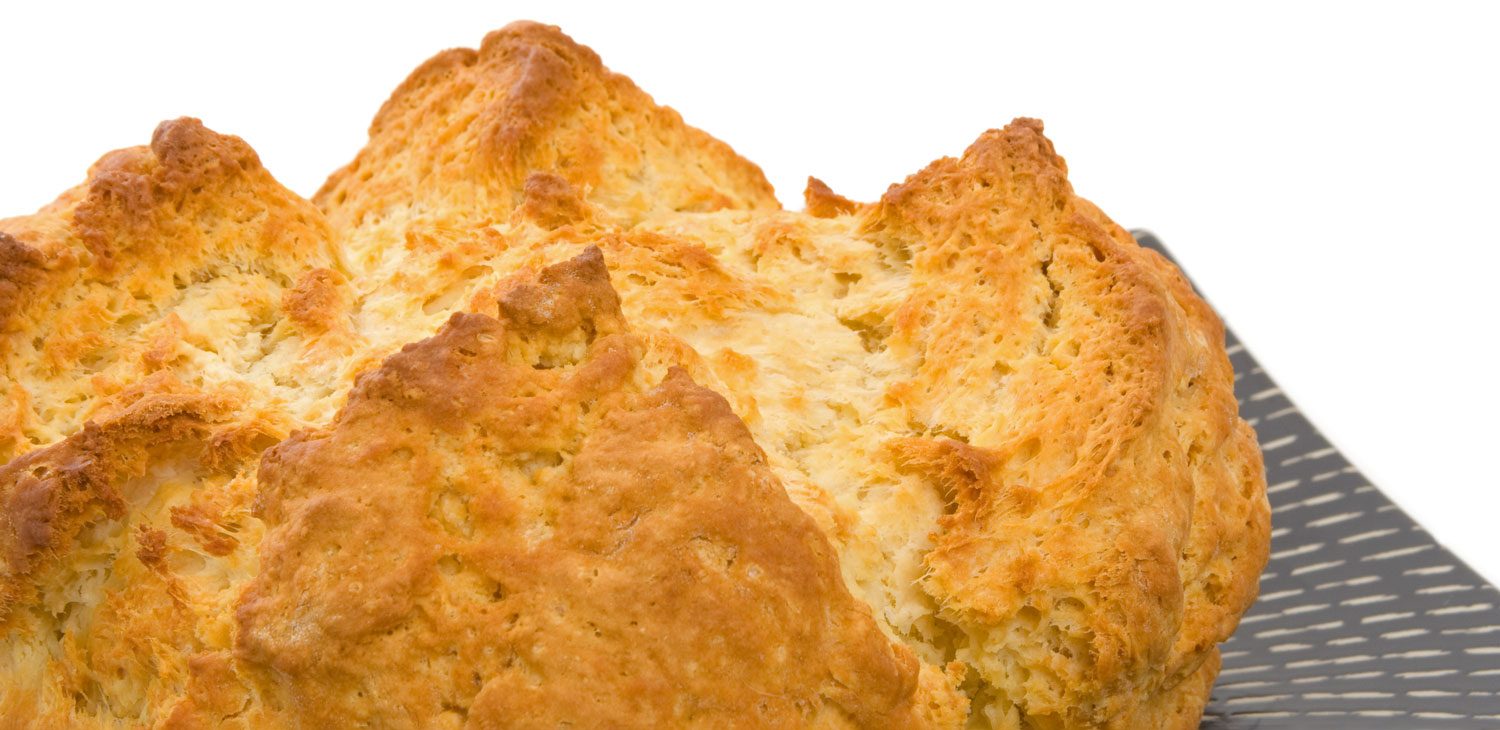
This is a very simple recipe that is quick to prepare. The result is similar to soda bread and is good to eat hot straight from the grill with some butter. You can experiment with adding herbs, olives or other ingredients to your damper dough. You can try adding chocolate chips or marshmallows if you want something sweet!
If you have an iron kettle or pan that will fit, you can use this instead of a metal tray for baking your damper on your O-Grill. This will make it heat more evenly and makes it less likely the base may burn. Traditional damper was always burned around the edges from the campfire, but you might prefer not to burn yours!
Preparing Aussie Damper Bread
Step 1 - Make the Dough
Sieve the flour, sugar and salt together into a bowl then work in the butter or lard with a fork or your fingers until you have a crumbly mixture. Mix in the milk and water and knead until you have a soft stretchy dough
Step 2 - Form the Damper Loaf
Place the mixture onto a floured tray and form it into a flattened ball about 6” across. Mark a cross into the top of the ball with a knife, this will make it open out during cooking. Brush with a little milk.
Step 3 - Fire Up Your O-Grill!
Set your O-Grill for medium heat of about 180C / 350F
Step 4 - Prepare Your Damper For Grilling
Place the tray with the damper on it onto the grill. Close the lid or loosely cover the damper with foil if it won’t fit with the lid closed. If you have an iron kettle or pan of the right size to put the damper in it will cook more evenly than it will on a tray, but it’s not essential.
Step 5 - Grill Your Damper
Cook in your O-Grill until the damper has turned a light golden brown colour and/or sounds hollow when you tap it. This may take upto 40 minutes. You might want to check it every 5-10 minutes to be sure that it is cooking evenly and not burning on the base. If it does burn a bit, don’t panic! It will make it even more like the traditional camp-fire version!
Step 6 - Serve While Hot!
Break open the damper and spread generously with butter to serve while it’s still hot!

